
Is your Instagram feed full of professional photos of you and your family? You wish! (And I wish too haha)
As a travel photographer, I might not be a professional, but I want my photos to look like I am. Nowadays, we get a lot of help with cool editing apps, our better than ever smartphone cameras, and unlimited #InstaInspiration. Still, there is so much we can do with the following DIY tools.
If you want to take it to the next level, here are the 10 ultimate tips for a breathtaking Instagram travel feed.
#1 Tip for a Professional Instagram Travel Feed: Shoot with a DSLR or Mirrorless Camera
Even though our smartphone cameras are better than ever, you will always get better results with a DSLR or mirrorless camera. Why? Basically, the sensors in DSLR or mirrorless cameras are a lot larger than smartphone cameras. It means that they can let in a lot more light so you’ll get better pictures, with more dynamic range, especially in low-light scenarios. A DSLR or mirrorless camera will also give you more creative control when it comes to focus, and exposure.
Which one to choose between a DSLR and mirrorless cameras? Mirrorless cameras are becoming more and more popular because they are more compact cameras than a DSLR, and still, they give amazing results when it comes to photo quality. I am currently using the Fujifilm X-A5, a stylish mirrorless camera, and I like it a lot. Click here to learn more about the Fujifilm X-A5 mirrorless camera.

When you’ll take photos with your DSLR or mirrorless camera, choose in your camera settings to save your photos in RAW, instead of JPG. The file format RAW captures all your image’s data recorded by the sensor when you take a photo. Also, no information is compressed with a RAW photo, so you will able to produce a much higher quality image, as well as correct problems your image might have that would be unrecoverable if you shot your photo in JPEG.
Even if your photos are quite small on Instagram, the editing you can achieve with RAW photos go well beyond what you can do with a JPG photo. This will give you breathtaking Instagram travel photos.
For an easy but effective crash course to become a better photographer, click here for my favorite The Beginner Photographer’s Bundle.
#2 Choose the right lens
When you have the right gear, aka the right camera, your next step will be to choose the right lens. Of course, your DSLR or mirrorless camera probably comes with a zoom lens, that you can use for almost all kinds of photography. This zoom lens can be okay for you.
If you want to take your Instagram travel feed to the next level, you need a lens for the kind of photographs that you want. Here’s the kind of lens you need for different types of photography.
- Best camera lens for everyday use: Telephoto zoom lens, 55-200mm
- Best camera lens for vacations: Superzoom lens, 18-200mm or 18-300mm
- Best camera lens for landscape photography, architecture: Wide or ultra-wide angle lens, 10mm to 24mm
- Best camera lens for candids, streets, weddings: Fast prime lens, 25 to 50mm
- Best camera lens for wildlife, safari: Long telephoto zoom lens, 70-300mm
- Best camera lens for portraits: Large aperture, medium telephoto prime lens, 60mm to 85mm and an aperture of at least f/2.8, but preferably f/1.8
- Best camera lens for action, sports: Large aperture, long telephoto zoom lens, 100-400mm
- Best camera lens for nights, low light: Wide aperture lens, any focal length, maximum aperture of at least f/2.8
Not sure what lens you will feel comfortable shooting with, or if a new lens is worth the investment? Fujifilm has a great program called Try & Buy. You can try a camera, lenses or accessories free for up to 3 days, at selected stores in Canada. That’s what I did on my last photography session: I tried a prime lens that I was not sure I would like so could make up my mind easily! Buying a lens can cost from 100$ to 10,000$, so trying it first is a sure way you won’t regret your choice!

Probably the zoom lens that was included with the camera you bought will do the job, but if you are shooting food, weddings or action scenes, then maybe you’ll need a different kind of lens to achieve a more professional look.
There is also a lot more to lenses and photography than what I am talking here. Since the goal of this article isn’t to turn you into a professional photographer, I thought you would have enough with that information to reach new heights on your Instagram travel feed.
#3 Keep things steady with a tripod
Of course, one day you will want to have your own picture taken, to post on your breathtaking Instagram travel feed. Selfies are authentic and fun. But if you want a photo of you in the distance or a candid picture, you’ll have no choice but to install your camera somewhere and move away from it.
To be honest with you, for a long time I didn’t want to carry a tripod with me when traveling. Then I bought a 12in flexible tripod, and it changed everything. I use it a lot, mainly because, with family photos, it always takes longer to get the right shot, and since I’m a little bit of a perfectionist, I can use this tripod to put my camera anywhere I want to get the perfect shot. This tripod can be wrapped around almost anything, and it is very sturdy. Best investment ever.
#4 Use a remote control
This tip goes with the one above… when you’ll want to take a photo of you, you’ll either use your camera’s timer, which can be just fine or a remote control, which I strongly suggest.
Why? Unless you pose and come off extremely well on the first shot, you’ll probably have to take several shots. Running back and forth to set up, again and again, your camera’s timer isn’t the best way to look relaxed and keep your patience. Moreover, if you are posing very far from your camera, you might not even be able to get to your spot on time for the timer.
Depending on what camera you are using, you can buy on Amazon a good remote control for $20.
#5 Think about the light
Harsh shade isn’t flattering. You obviously don’t want to invest a lot of money to buy bulky lights and reflectors.
Let’s keep it simple: sunlight is the best light there is. Sunlight early in the morning and at sunset is the best light there is because it is almost horizontal and will light up your whole body. Try to avoid bright sun on a clear day, at noon. If the middle of the day is your only moment when you can shoot photos, try to have the sun in front of you and not in your back. Moreover, if the bright sun gives you harsh shade in your face, you can use the flash of your camera to light up these shade areas.
#6 Shoot square
Before Instagram even existed, all the photos we were taking were either landscape or portrait. Now, as you already know, Instagram’s photos on your feed are best when they are square. So if you can, modify the setting on your camera so the photos you’ll take will already be square. If you don’t have that option, try to squeeze everything you want to see on your photo in an imaginary square. That way, you won’t cut off anyone’s head or have to choose between 2 elements that appear on each end of the photo.

This is one of our most popular photos on Instagram. Notice the rule of thirds and composition 😉
#7 Your photo’s composition
The rule of thirds is still a very good trick to make your photos look breathtaking. This is called “composition”. When we were shooting landscape or portrait, we were trying to frame our subject at imaginary intersecting points, off-center, dividing the image into nine equal parts. But now, for square images, placing yourself or your subject in the center can actually work quite great. You now have the option!
#8 Focus
One very simple way to make your photos look a lot more professional and make brands want to work with you, is to only focus on your subject. Unless you are taking photos of a landscape, it makes a huge difference if you only focus on the subject of your photo.
For example, if you are taking a photo of your baby smiling, try to focus only on your cute little baby, and leave the background in a blur. You can choose how large your focus will be with the camera’s aperture, shutter speed, ISO setting and, of course, the amount of available light. To understand all these settings correctly, I strongly suggest you follow the great photography course The Beginner Photographer’s Bundle.
-

- Focusing on everything… boring!
-

- Focusing only on our cute socks: great! This photo featured in Lonely Planet’s top Instagrams from November 2018
If you are taking your photo with a phone, use the Pro mode, and then in the “Focus” setting, you can choose the right setting for your photo setup.
#9 Strike a Pose
There are new Instagram posing trends every six months or so. I strongly suggest you find your own unique pose. This will become your personal brand, and when your followers will see a photo of you, they’ll recognize your style and it will make you stand out from the crowd.
As a family travel blogger, I chose a family pose that we can do wherever and whenever we want a family shot. It makes things so much easier because I don’t always have to come up with new creative ways to showcase our family adventures.
-

- Our family photo before our signature pose
-

- Our family kissing each other… this is our signature pose, and we love it!
Wander around Instagram and look at what other accounts like yours are doing. Then look at other kinds of accounts. Let’s say your account is all about travel, you can look at fashion accounts, food accounts, etc. You can save the posts you like and then pick and choose your favorite kind of pose.
Experience also different kind of pose to see how your photos will look like. Maybe you like a straightforward pose, but find out after experiencing it that you don’t like how you look when you pose like that.
I personally really like candid photos. I think we bring so much attention on ourselves on Instagram, no need to make it overly about us haha.
I also noticed that even though we feel we keep our back straight in real life, we easily come off with rounded shoulders on pictures. Keep your back straight, and you will instantly inspire confidence.
For more tips on how to take amazing swimsuit photos of yourself, click here.
Another tip for you: if you are going to an event or on a trip and you want great photos, research what was posted before on Instagram. You can search for photos that have your destination’s geotag, and then find great spots for pictures you haven’t thought of. If you want incredible family photos or girlfriends shots, search for them with the use of relevant hashtags, and save the shots you want to be the same. Then at your destination, you will already have creative photo ideas to inspire your photography session!

Show your face, and you’ll get more likes and comments!
Finally, what kind of photos are the most popular on Instagram? A study by Yahoo Labs and Georgia Tech found that photos with faces get more likes (+38%) and comments (+32%) than those without.
So smile and strike a pose! 🙂
#10 Edit your photos like a pro with Lightroom Presets for a breathtaking Instagram travel feed
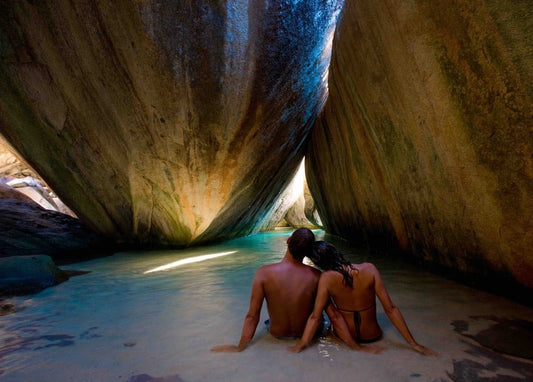
Do you follow @debiflue on Instagram? She is A.M.A.Z.I.N.G! She’s the first one that made me want to start using presets. Yes, Instagram filters are nice, but we are way beyond those now. (She’s the one on the cover photo above)
You can easily buy breathtaking presets from your favorite influencers on Instagram. You can also create your own! What’s nice about Lightroom presets is they work on both your computer and phone. Of course, I think my presets are AWESOME! I’ll give you a link for you to download my presets very soon… stay tuned!
With only a click, you can change the whole look of your Instagram photos. Stick to only a couple of similar presets so your feed is visually pleasing.
Gone are the days when oversaturated photos are popular. Now we definitely notice a clean, even undersaturated trend on Instagram. You can choose a brown, grey, pink or blueish color theme for your photos: whichever you choose, stick to it for at least 9 photos on your Instagram travel feed. You want the people that look at your gallery to be inspired, not to get nausea. And if you want to switch your color theme, please do it gradually.
What’s your own favorite tip to get a breathtaking Instagram travel feed? Please comment below!
This article contains affiliate links that if you click and buy from it, it won’t cost you a dime more, but it’ll help me to continue doing my job of bringing you the best content. Thanks a lot for encouraging me!